
Last Updated on December 7, 2019 by Team CrazyJackz
Are you tired of getting a simple manicure each time you go to the salon? Or do you feel like you want to stop doing your nails on your own? Plenty of women swear by nail extensions, others love overlays, and some even do different types of overlays (Acrylic overlay and gel overlay). Figure out what is the best option for you & strengthen your nails by reading through our guide.
What are overlay nails? Overlay nails vs Nail extensions?
Your false nails can come in two different types, and those are overlays and nail extensions. If you go to the salon and you ask your nail tech about the perfect artificial manicure, they will let you choose between two different types.
Nail extensions are nail tips that you get from small & lightweight plastic. This plastic is already pre-cut and shaped per your natural nail. After that, this nail is applied & glued on top of your natural nail. To secure your nails, the manicurist will have to seal the top with a proper mixture. They will use either acrylic or gel on top of your plastic tips to hold them in place.
Left: Overlay nails | Right: Nail extensions
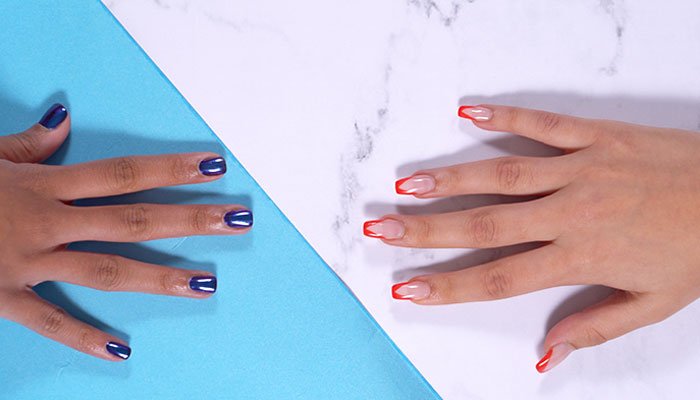
On the other hand, overlay nails are nails in which there are no plastic extensions. Your nails will stay ”bare” and will get only the mixture on top. This means that your manicurist will use either the gel or acrylic overlay. What is the difference between these two overlays? Which one is better for your nails? We will explain this down below.
Types of overlays
There are two kinds of overlays. You can choose either..
- Acrylic overlays or
- Gel overlays.
Acrylic Overlays
What are Acrylic overlay nails?
An acrylic overlay means applying a set of nails that are made with acrylic powder. This is a liquid monomer that hardens once exposed to air. Acrylic nails are amazing at providing you protection but are a lot more artificial-looking than gel overlay nails.
Why get an acrylic overlay? (Pros of getting an acrylic overlay)
There are a few reasons why acrylic nails may work for you, and those are:
- Protected Nails: You will have a thicker surface, and your nail beds will feel secure at all times.
- Long-lasting manicure: Your manicure will last for 20 days without chipping!
- Cheap to purchase: If you are going to DIY acrylic overlays, simply know that they are not too expensive. You can purchase these at a beauty shop and always ask for EMA acrylic (Ethyl methacrylate) since it is a lot safer than other kinds.
- Does not demand a UV light since it can cure down & harden on its own.
- There are plenty of videos on YouTube & Instagram that can help you achieve this look.
- Perfect for any nail type, shape & length.
Cons of getting an acrylic overlay:
- Damaged nails: Unfortunately, an uneven & unprecise application can leave you with damaged natural nails. This substance can be too thick on top of your natural nails. If your nails are brittle, short & easily irritated, you might have a hard time rocking the acrylic overlay
- Don’t look natural: The liquid monomer powder will look fake once compared to the gel overlay. If you are someone who loves longer nails & you want your nails to stand out, you won’t mind this fact. However, if you are going for a natural manicure, stay away from acrylics.
- Very hard to do on your own if you have no experience.
- You will have to use a lot of different materials to achieve these nails.
How to apply an acrylic overlay?
First off, you should know that there are some steps that you need to do before jumping onto this task. Make sure that you:
- Protect your cuticles and the skin around your nails before you expose them to harsh chemicals
- Have all the tools sterilized
- Use a high-quality nail file
Step by step process how to do acrylic overlay nails –
Step 1: Prepare your nails by removing any polish or leftover color. Clean your nails with soap & lukewarm water.
Step 2: Trim your nails just a little bit so that all of them are the same size.
Step 3: Buff them with a nail file or a nail buffer to get the surface rough & flat since this will allow you better application of your acrylic.
Step 4: Prep your nails with a particular coat that is used for acrylic overlays.
Step 5: An acrylic liquid and the acrylic powder should be poured into two separate dishes.
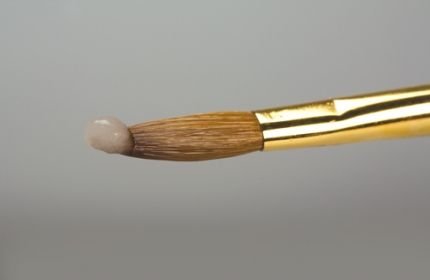
Step 6: With a small brush, you or your manicurist should pick up the acrylic and create a little moist ball on top of the nail. It is important to dip your brush into the liquid and then into powder to get the right consistency.
Step 7: It is crucial to work fast & steady since this little ball can quickly harden. Usually, your nails will set & dry down on their own in 10 minutes.
Step 8: You can cure your nails under a UV light for two minutes if you want to speed up the process. File your nails in your preferred way, and you’ll be good to go!
Who should get acrylic overlays?
In the end, this overlay will suit you if you prefer long-lasting and noticeable nails. However, you shouldn’t do these on your own if you are inexperienced. Acrylics can be harder to achieve than the gel nails, so make sure you are well-aware of what you’re getting yourself into before committing to this style.
Gel overlay nails
What is a gel overlay?
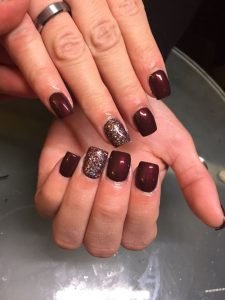
Gel overlay nails are applied with a thick & hard gel directly on top of your natural nails. Gel nails won’t give you as much support as acrylics would, but they are still way sturdier than your regular nail polish. A gel overlay is the most simple & common treatment at a salon, and almost everyone has had a gel overlay at one point. Usually, women who work at the office get this set since it is low-maintenance & sturdy.
Why get a gel overlay? (Pros of getting gel overlay nails)
- You love your natural nails: Do you feel like you have naturally beautiful nails? But you feel like you could use a bit more support? If so, a gel overlay will suit you the best since it is not as thick as an acrylic powder.
- You want to prevent them from chipping: Your nails won’t chip as often as they would if you had a simple polish on top.
- You don’t want them to last for too long: If you are someone who loves switching up your manicure every here and there, you will like these nails. Gel overlays can last for 10-15 days, which means that you can experiment with different colors more often than you would with acrylics.
- Thinner surface to work with
- Perfect for the office
- Easier to achieve & do on your own than the acrylics
Cons of getting gel overlay nails:
- You will need a lot of different tools: When doing the gel overlay, you will need a lot of different tools (which we will mention & talk about later in the article). If you are someone who loves to DIY your manicures & you don’t feel like going to a professional, you won’t mind this fact. However, if you don’t want to invest in all different tools, rather stick to your manicurist.
- Your nails may need to rest at one point: Plenty of nail techs do recommend that you wait up to 6 weeks for your nails to recover after gel overlays. If you’ve been doing these for years, your nails may need to rest at one point & you should give them a break before you continue with any manicure.
- You will need a UV lamp for this manicure
How to apply the gel overlay?
Make sure you have the right set of tools, such as:
- A nail file
- A nail buffer
- Primer
- Base gel
- Color gel
- Topcoat
- UV lamp
Step by step process how to do gel overlay nails –
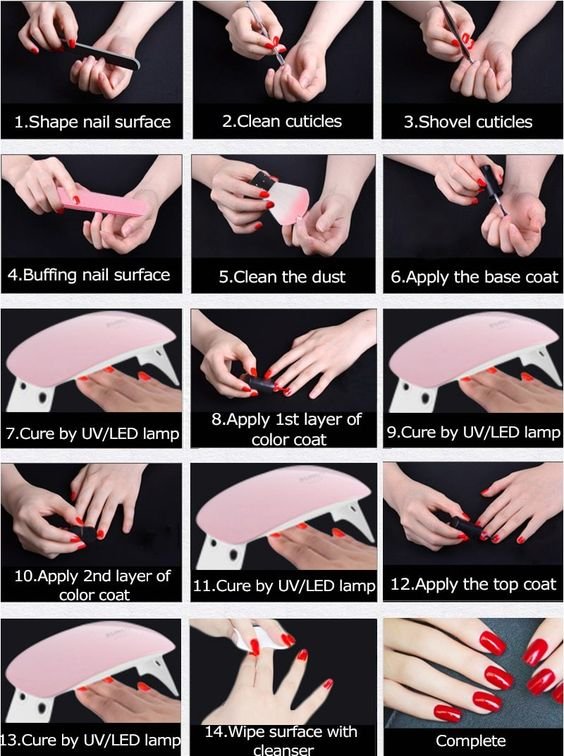
Step 1: Clean your surface with an acetone-free nail polish remover. Give your nails a bit of shine & make sure your surface is clean.
Step 2: Use a primer (or a base coat) for your gel nails. Apply one layer and let it dry.
Step 3: Apply your clear gel on top of your nails. Use one coat and cure it under a UV lamp. Let it stay under it for 60 seconds.
Step 4: Apply a second layer, which will be your color of choice. It can be any shade, based on your style & preference.
Step 5: After you are done with one or two coats of color, set it with a top coat. Also, dry your nails under a UV lamp for 60 seconds.
Step 6: After your nails dry down, use an acetone-free remover. Dab a bit of it onto your cotton pad and remove the excess shine as well as the sticky residue that is on top of your nails.
Step 7: Shape your nails into your preferred shape. Use a nail buffer to smooth down the surface.
Who should get gel overlays?
Women who love thinner nails (once compared to acrylics) will enjoy gel overlays. If you are someone who loves to DIY your own nails & you feel like switching up your color every here and there, you will love gel nails.
How to remove acrylic overlay nails & gel overlay nails?
In case you end up being fed up with your acrylic or gel overlays know that you can remove them on your own. If you don’t have the right set of tools nor time you can visit your manicurist. However, if you decide to do DIY, make sure you follow this process:
What you will need:
Cotton balls, Clippers, Pure acetone, Nail drill or nail file, New nail polish to apply on top, Cuticle oil, A hand cream
Step by step process:
- Try to remove your nails by soaking them in acetone for 2-3 minutes. If you’re working with acrylics it may take you up to 10 minutes to remove them.
- You can also apply a heavy amount of acetone to your cotton balls and wrap them around your fingers.
- Clip off any excess which has lifted on its own. You can also trim your nails if they are too long at this point.
- File down the overlay which has previously lifted with a nail file. Make sure your moves are not too harsh & make sure you are precise so you don’t hurt yourself.
- If you have an electric drill scrape down the surface of your nail. This will remove the excess coat of either the acrylic or gel.
- Once everything is off file your nails to your preferred shape.
- Provide your nails with moisture & hydration by applying a hefty amount of oils & hand creams on top.
- Wait for 2-3 hours till everything soaks in before you apply your new nail polish on top.
What manicure is ideal for you?
In the end, choose a manicure which suits your preference. If you are trying to achieve a set of long (fake nails) go for nail extensions. However, if you want to get a simple overlay; choose between the acrylic overlay or the gel overlay. Acrylics will last a bit longer than your gel manicure, but they may seem a bit thick & fake for your preference. On the other hand, a gel overlay will suit women who love to switch up their nail color often & on their own. There is no right or wrong, simply choose something that speaks to you more.
- Everything To Know About The Overlay Nails | Acrylic Overlay, Gel Overlay - October 18, 2019
- Everything to know about Acrylic Toenails | False Toenails - September 5, 2019